Stripe Connector Setup Guide
This guide explains how to set up Stripe in Strand in a simple, practical way.
What this connector does
The Stripe connector lets Strand:
- pull Stripe customer data into Accounts,
- map Stripe fields to Strand fields,
- apply filters so you only sync the customers you want, and
- preview data before running a full sync.
Before you start
Make sure you have:
- Admin or Owner access in the organization (required to save settings and run sync/preview).
- A connected Stripe account.
Connection options:
- Recommended:
Settings -> Connectors -> Stripe -> Connect Stripe Account(OAuth). - Alternative:
Use API Keyand provide a read-only Stripe secret key.
Step 1: Configure sync settings
Open: Settings -> Connectors -> Stripe and stay on Configure.
1) Expand fields (optional)
Use this to include extra Stripe objects like subscriptions or tax IDs when needed. Here it is recommended to use the default settings.
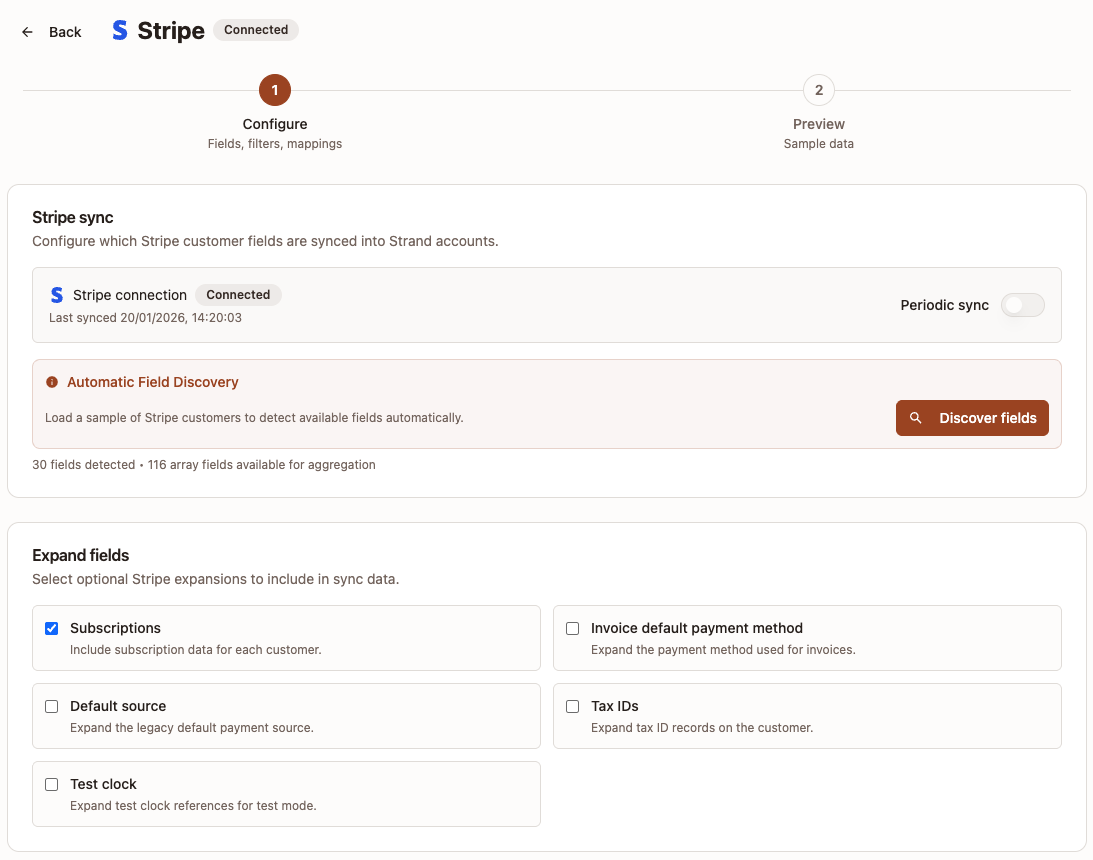
2) Discover fields (required)
Set Periodic sync first:
- Turn it on for automatic ongoing updates (recommended).
- Turn it off if you only want manual sync runs.
Press Discover fields now.
- This loads available Stripe fields from sample customer data.
- Run it again after major expand/filter changes if field options should refresh.
3) Create-missing behavior
Choose whether Strand should create new accounts when no match is found.
- On: create + update
- Off: update matched accounts only
4) Account matching
Choose how synced Stripe customers are matched to existing Strand accounts:
Domainfor company-domain matching.External IDfor Stripe/customer ID matching.Domain + External IDfor flexible matching.
Then set mapping paths:
Company name(recommended)Company domain(required for Domain mode)External Customer ID(required for External ID mode)
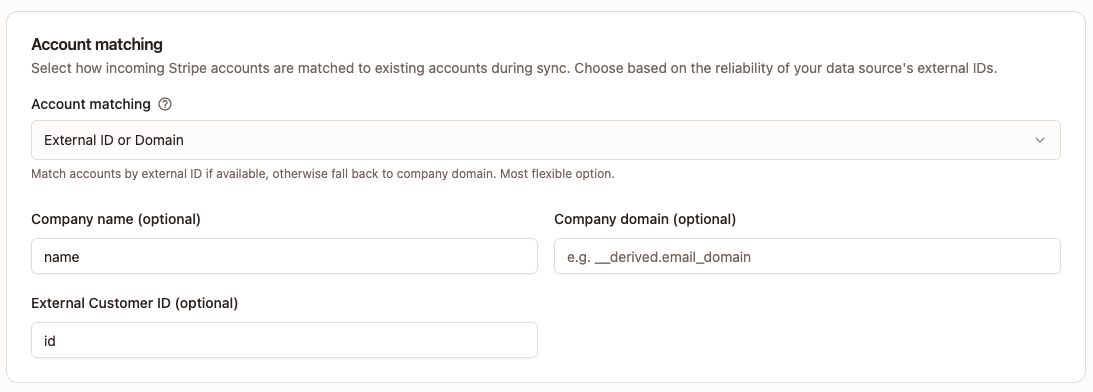
Tip: if using domain matching, __derived.email_domain is useful for extracting domain from Stripe email.
5) Filters
Limit which Stripe customers are included:
List filters: email contains, created after, created beforeSearch query: Stripe search syntax (when you need precise filtering)

Note: Use Search query with empty input when you want to sync all customers without any filters.
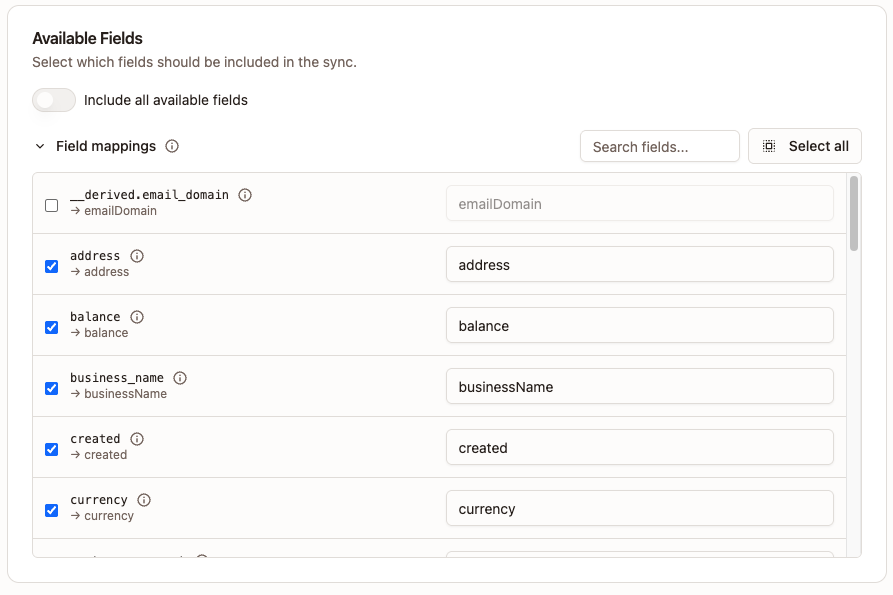
6) Available fields and field mappings
Choose what to sync after Discover fields has loaded the field list.
- Left side: Stripe source fields
- Right side: Strand target field names
Use clear camelCase for Strand target fields, for example:
companyNamecompanyDomainexternalCustomerIdplanName
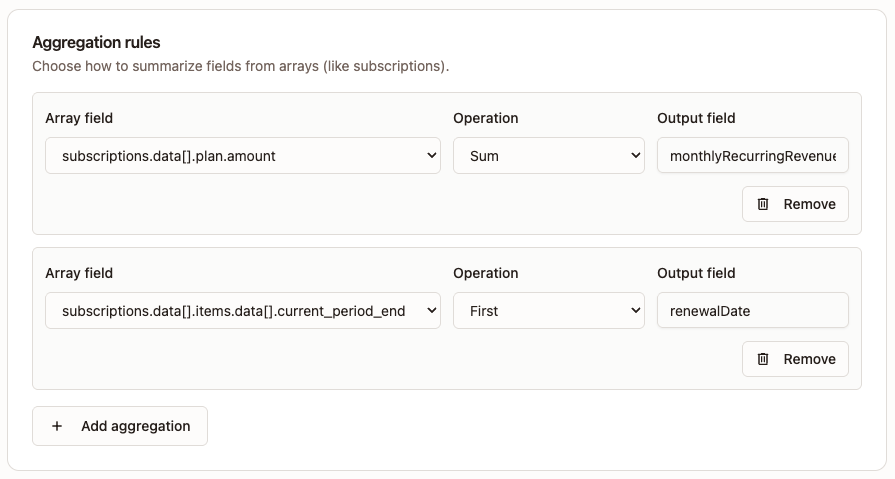
7) Aggregation rules (optional)
Use this when a Stripe field is an array (for example subscription items) and you want one summarized value.
Common operations:
first/lastmin/maxsum/avgcount
8) Save
When setup looks good:
Click Save
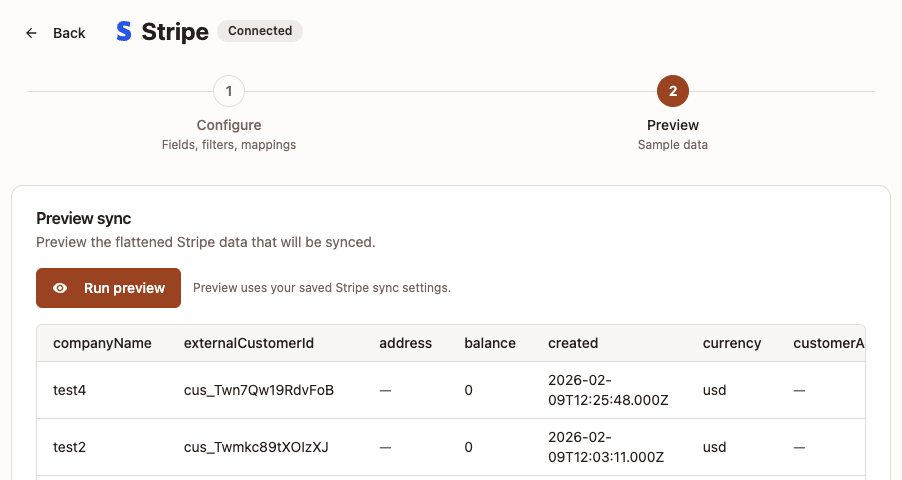
Step 2: Preview
Go to Preview and click Run preview.
This shows sample rows using your saved config so you can verify mapping and field quality before wider sync usage.
You can also use the status area to check recent sync state and last completed sync time.
Validation rules you may hit
- If
Domainmatching is selected,Company domainmapping is required. - If
External IDmatching is selected,External Customer IDmapping is required. - If
Domain + External IDis selected, at least one of those two mappings is required.
Troubleshooting
- No fields available: run Discover fields first.
- Save fails with mapping error: check Account matching mode and required mapping fields.
- Too many rows skipped: check
Create new accounts when no match is found. - Preview returns no rows: loosen filters or verify Stripe account has matching customers.
- Manual sync blocked: confirm your role is Admin/Owner and Stripe is connected.